【01】用意するもの
■カッティングボード(なければ100円均一で粘土板でもOK)
■カッター(なるべくペン型のもの。)ホームセンターで600円~1200円程度)
■色紙(私が使ったのは100円均一の色画用紙6~12枚で100円)
■ベルトの穴あけ機(ホームセンターで1200円~1500円)なければ不要。
■トレーシングペーパー(プリンターで出力する場合はコピー用紙でOK)
[01] What is prepared
■ A cutting board
■ cutter.
■ colored paper
■ Tracing paper
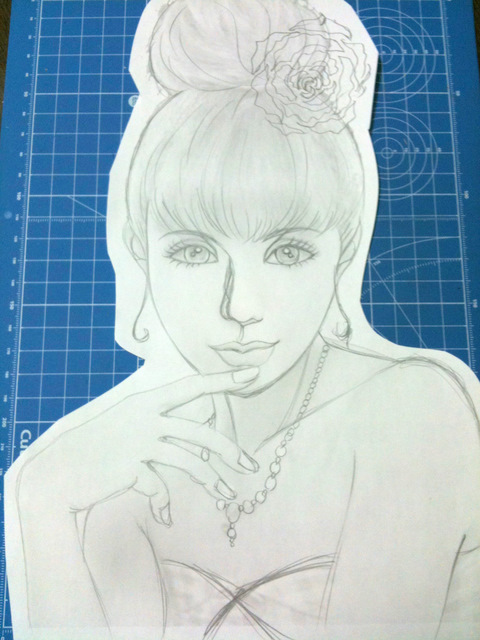
【02】下準備 1
■まず、パソコンで人物を選択し、A4に印刷。
このとき、50%くらいの濃さにして、白黒で印刷します。(カラーでもOK)
※パソコンがなくても、好きな写真をトレーシングペーパーに写せばOK.
■次に、線を鉛筆でなぞり花などを付け足したり髪型を整えたりします。(瞳は少しだけ大きく書くとかわいくなります。) このとき、各パーツが離れないように線を追加するのをお忘れなく。 下の写真でいうと眉毛と目の間の線、鼻と口を結ぶ線がそれにあたります。
[02] Preparation 1
■ First, It prints on A4 size. and it prints in black and white.
■Next, It traces with a pencil.
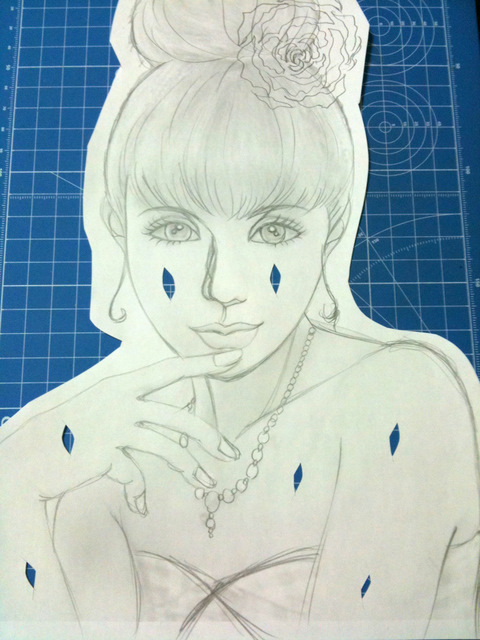
【03】下準備 2
■次に、余白を切り取り、カッターでテープをとめるための穴をあけます。 このとき、切り取る部分に穴を開けるようにします。(そうしないと紙にテープののりがついてしまいます)
[03] Preparation 2
■ Unfilled space is cut off and the hole for stopping a tape by a cutter is made.
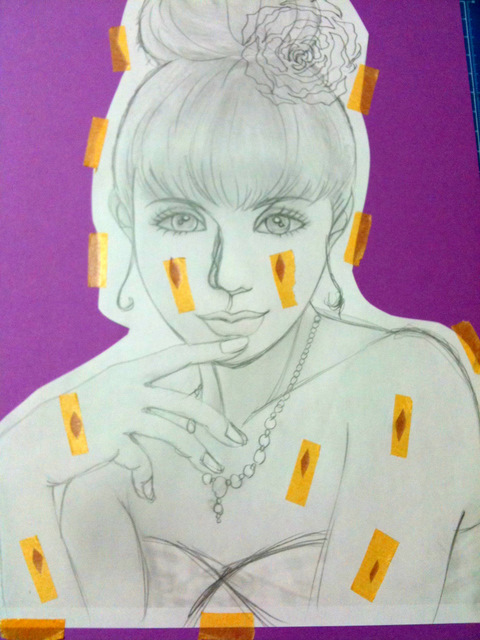
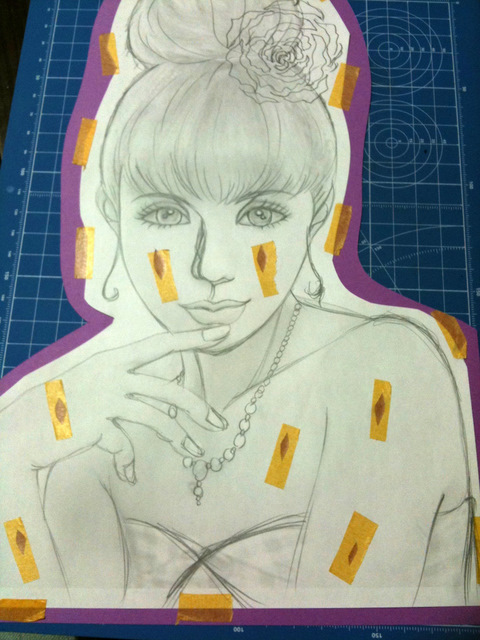
【04】下準備 3
■先ほどの穴と、周りをテープで貼り、画用紙に固定していきます。
[04] Preparation 3
■ It sticks on a tape and fixes to drawing paper.
【05】下準備 4
■紙の余分なところはカットしておきます。
[05] Preparation 4
■ The excessive place of paper is cut.
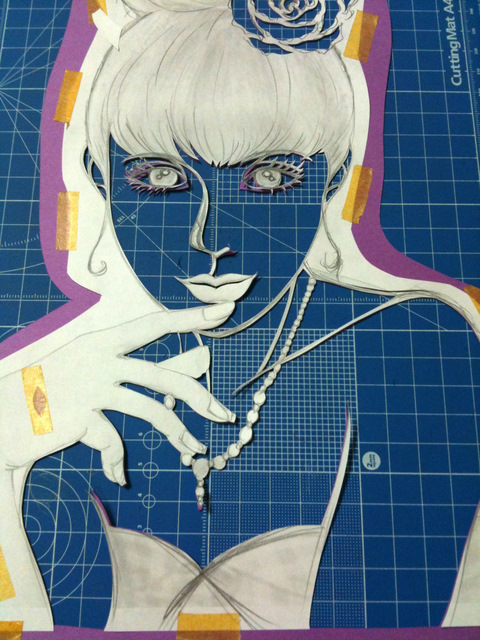
【06】切り方 1
■いよいよ、カットです。 必ず、カッターナイフの刃が新しくなるように、交換するか、長いものは折って新しくしてから始めます。
■はじめに、中央部分の細かいところから始めますので、私の場合は目から切っていきます。
[06] How to cut 1
■ Please be sure to exchange so that the edge of a cutter knife becomes new.
■ In my case, since it begins from the fine place of a central portion, it starts with eyes.
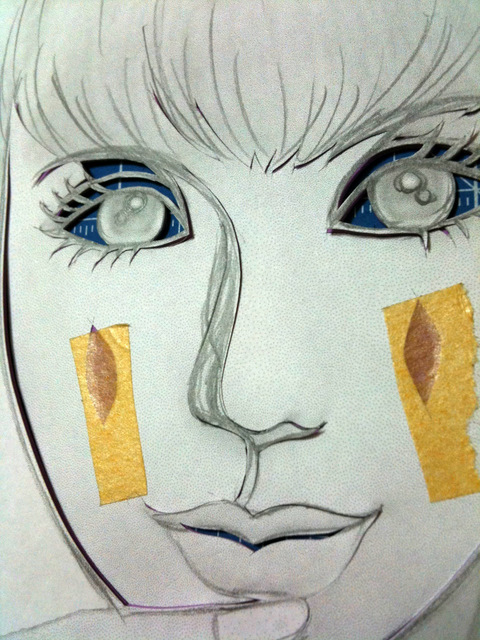
【07】切り方 2
■次に眉毛や顔の内側をぐるりと切っていきます。(切ってはいけないところを切らないよう注意!)
[07] How to cut 2
■Eyebrows and the inner side of a face are cut round.
■It warns against cutting the place which must not be cut!

【08】切り方 3
■切り抜いたら、抜けた紙をそっとはずします。このとき、切れていないところがあると破けることがあるので注意してください。
[08] How to cut 3
■If it clips, unnecessary paper will be removed quietly.
■It warns against breaking!
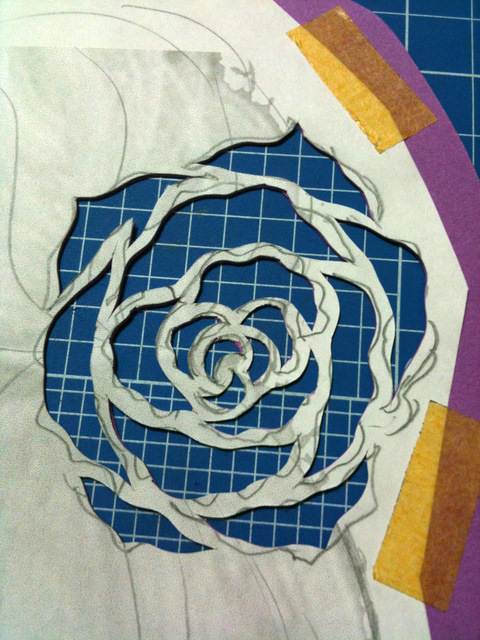
【09】切り方 4
■次に、髪飾りを切り抜きます。この場合も中心から切り抜きます。
[09] How to cut 4
■A hair ornament is clipped.
■Also in this case, it clips from the center.
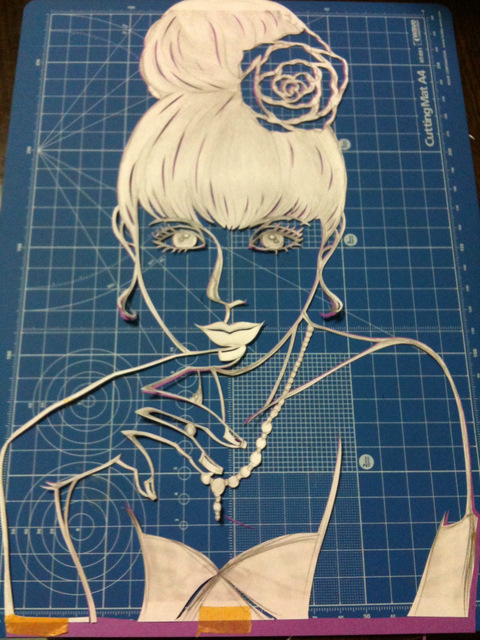
【10】切り方 5
■次に首から下を切り抜きます。一番外側は最後まで切らないように注意してください。 その次は髪の毛と手も切ります。
[10] How to cut 5
■Others are clipped.
■Be careful not to cut the outside to the last.
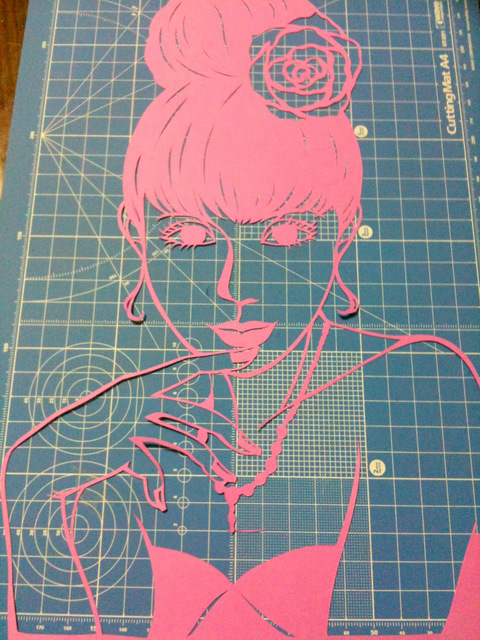
【11】切り方 6
■内側のすべてが切り抜けたら、一番外側を切り取ります。(外側を切ってしまうと、紙と下書きが離れてしまうので十分にチェックしてから切り取りましょう。)
[11] How to cut 6
■The outside is cut off.
■If the outside is cut, paper and a draft will separate. Let's cut off after fully checking.
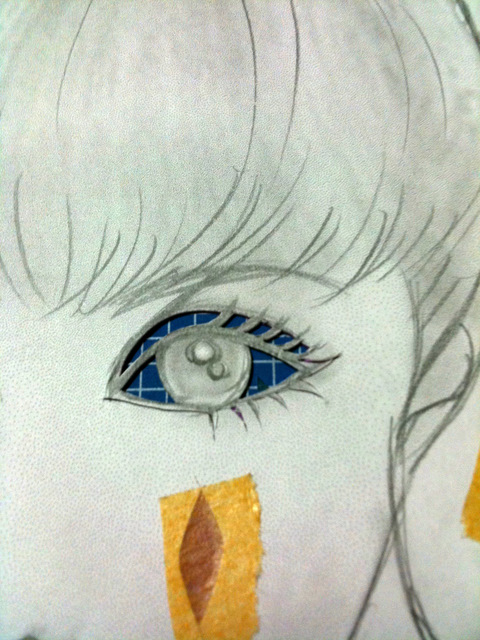
【12】切り方 7
■下書きをはずしたところです。ベルトの穴あけ機を使って瞳に光部分の穴を開けます。ない場合はカッターで切ります。
[12] How to cut 7
■It just removed the draft.
■A hole is made in the portion of eyes.
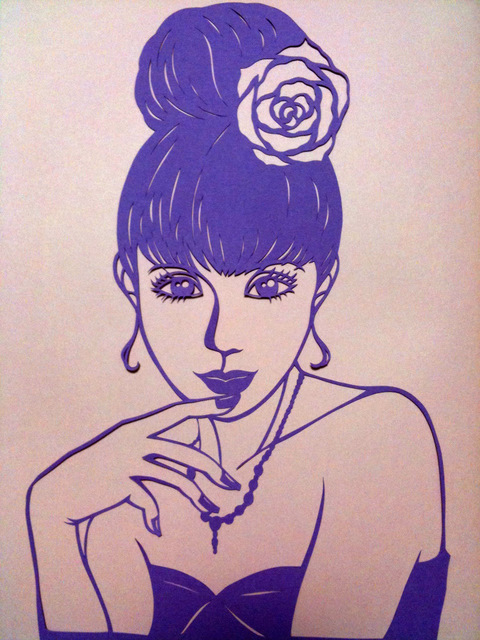
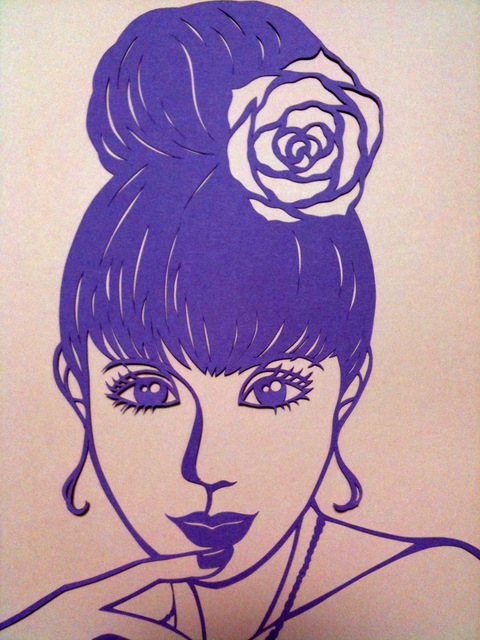
【13】完成
■こちらが完成です モデルは「益若つばさ」さんでした☆
[13] Completion
■This is completion.
■a model --- She was" Mrs. Tsubasa Masuwaka"